Have a domain you’re attached to? You can smoothly integrate it with Brimble to capitalize on our platform’s robust capabilities and infrastructure. Whether you’re moving an existing project or aiming to uphold your established online identity, follow these steps crafted for developers like you to seamlessly add your custom domain.Documentation Index
Fetch the complete documentation index at: https://docs.brimble.io/llms.txt
Use this file to discover all available pages before exploring further.
Navigate to Your Project's Domain Settings
Start by selecting your project from the dashboard. Once you’re in, head over to the Settings tab. From
there, locate and click on the Domains menu item. This will take you to the domain settings page where you
can manage your project’s domain configurations.
Add Your Existing Domain to Your Project
On the Domains page, you’ll find a field where you can enter the domain you want to integrate with your
project.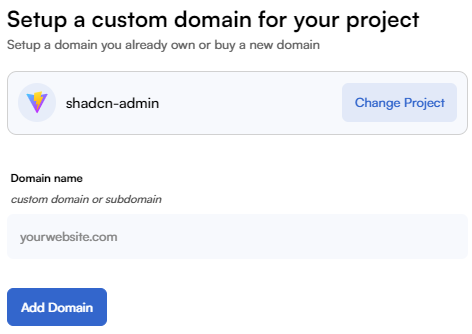 Simply type in your existing domain name to proceed with the addition process. This step paves the
way for seamless integration of your chosen domain with your project on Brimble.
Simply type in your existing domain name to proceed with the addition process. This step paves the
way for seamless integration of your chosen domain with your project on Brimble.
Configure Your DNS Records
To ensure your domain works with your project, you’ll need to configure its DNS records with your domain
registrar. The Brimble dashboard will provide you with the necessary DNS settings and guide you through different
methods for configuration. Follow these instructions to complete the setup and link your domain seamlessly to your project.
The Brimble dashboard will provide you with the necessary DNS settings and guide you through different
methods for configuration. Follow these instructions to complete the setup and link your domain seamlessly to your project.